MADDE/Qt extended example/Part1
Contents |
[edit] Create a project and the basic UI in QtCreator
[edit] Start a new project with QtCreator
In a first step you have to create a project in QtCreator. Windows user should consider to save the project in the MADDE folder (default location: C:\MADDE\<version>\home\<username>), to make the testing on device easier. Please follow these steps to do that:
File -> New File or Project

Select:
Qt4 Gui Application -> OK

Choose a Name and location for the project -> Next

Select no additional module -> Next

Leave the class information as it is -> Next

Finally click on Finish
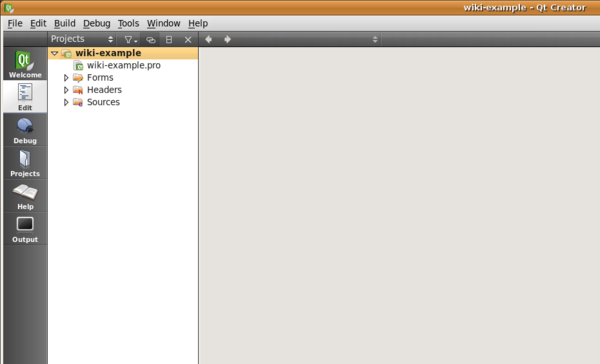
Now the project is created and the result should be the following:
The structure of the new project is the following:
wiki-example
    Forms
      mainwindow.ui
    Headers
      mainwindow.h
    Sources
      mainwindow.cpp
      main.cpp
[edit] Create the user interface
The goal of the next step is to use QtDesigner to create the user-interface. To get a general idea about QtDesigner, .ui files and how you can use them in your application, please consider the QtDesigner manual, which provides you further information. The following shows, how to build a simple UI for the example application, which should contain a QListWidget and three QPushButtons. In the first step after creating the project, you have to open the mainwindow.ui file, which you will find in "Forms". In the view you should see now the main window of the application. Now you can start creating the customised user-interface:
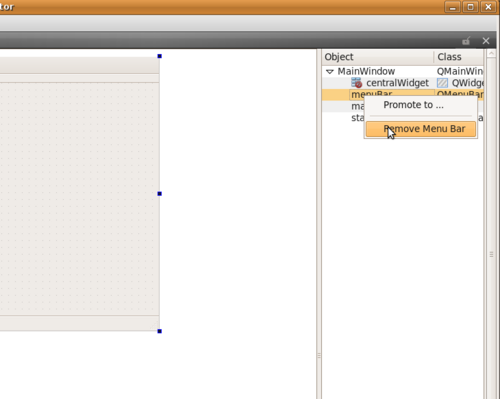
1. Remove menuBar, mainToolBar, statusBar
As it is shown on the picture above, please remove these three components, as they are not supported in Maemo5.
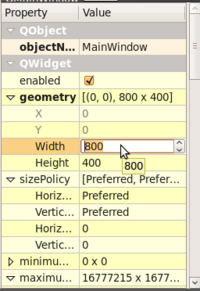
2. Change the size of the mainwindow to 800x400.
In the down-right corner you can specify the preferred size of the window. Please make sure, that it is 800x400.
3. Create and place the needed components
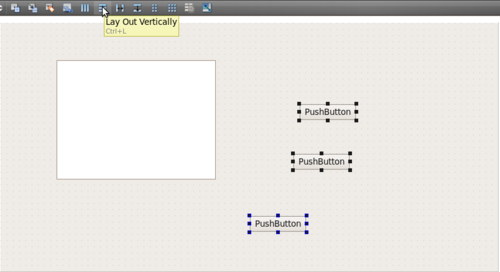
As described earlier, we need one QListWidget and three QPushButtons. Drag them from the list besides onto the mainwindow. It makes sense to give them reasonable names, which you can do in the object-list in the upper right corner. The mainwindow should now look like:
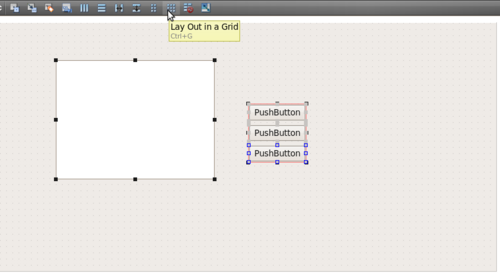
In the next step, please select first the three buttons and then click on "Lay Out Vertically" like in the picture above. After that is done select the list widget and the button-layout together and click on "Lay Out in a Grid", as you can see in the following picture.
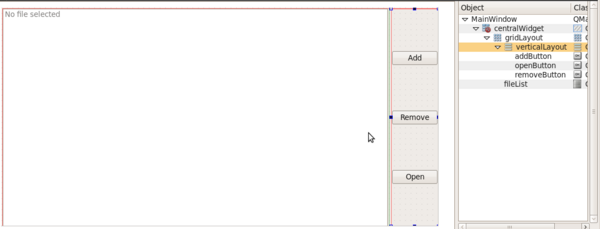
Finally please maximise the grid-layout to fill the whole mainview and change the label of the push-buttons by double-clicking on them to "Add", "Remove" and "Open". By double-clicking on the list-widget you can add an item like "No file added yet" and disable it in the properties. The result should be like:
[edit] On Device
Now it is already possible to test the result on the device. Therefore you can use the mad-developer client. Please have a look at the chapters, which explain:
- how to set up the mad-developer client
- how to test the example
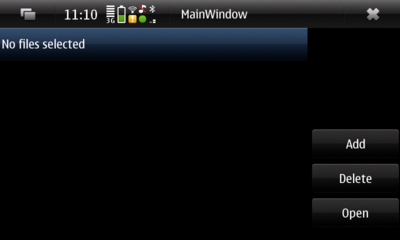
Following this, the result should look similar to this screenshot:
[edit] Useful links:
- This page was last modified on 17 February 2010, at 08:19.
- This page has been accessed 11,678 times.

