PyMaemo/UI tutorial/Windows and dialogs
When creating applications for hand-held devices, you should take into account several issues about usability and device limitations. Screen size is a particularly large restriction; a simple interface is essential.
In contrast with GTK+ applications, Hildon applications display only one window at a time. A typical Hildon application uses several windows representing different views in a tree-like hierarchy.
Example 1.2 has already shown how to use a simple HildonWindow can be used and how it resembles the use of a classical GTK+ window. The tree-like views represent a new concept introduced by Hildon.
To properly understand what views are, think of an application as a program that allows the user to perform one or more tasks. Each task can be broken down into several main activities.
Main activities in tasks must be done and presented in separate application views or windows, while assistance activities and steps to fulfill those tasks must be done in dialogs and menus on top of the currently displayed view.
Views work in a tree-like hierarchy. Root View acts as the "root" for the tree, and the subsequent Sub Views branch down the hierarchy.
The view concept is implemented by the widget HildonStackableWindow. This widget allows building a navigable hierarchy of windows with less code.
Contents |
[edit] Stackable windows
The HildonStackableWindow is a GTK+ widget which represents a top-level window in the Hildon framework. Stackable windows can be organized in a hierarchical way.
A stack sets the hierarchical relationships between windows. A child window is on top of its parent window. That allows navigation to previous window by removing the topmost window.
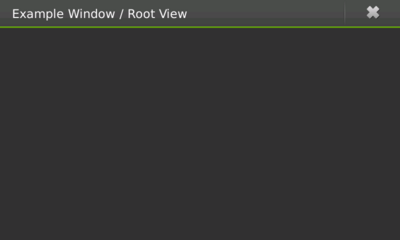
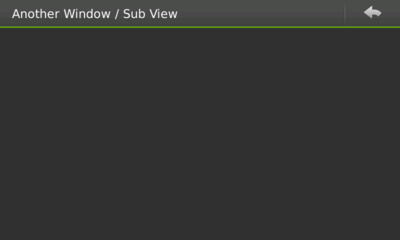
Users can only see and interact with the window on the top of stack. All other windows are mapped and visible but they are obscured by the topmost one. And the users can go back to a root view from a subview by clicking in the navigation button in the top right corner of the window.
Each application has a default stack, and windows are automatically added to it when they are shown using show(). Most applications do not need to create extra stacks. Create more than one stack could make your UI too complex, so think twice before doing it.
Let's see a simple example to show the use of this widget. This simple program creates a stackable window with a button to navigate towards a subview, a new window on top of the stack.
Example 2.1. Example of stackable windows
# Based on C code from:
# "Hildon Tutorial" version 2009-04-28
# Example 2.1, "Example of stackable windows"

import gtk
import hildon

def show_new_window(widget):
    # Create the main window
    win = hildon.StackableWindow()
    win.set_title("Subview")

    # Setting a label in the new window
    label = gtk.Label("This is a subview")

    vbox = gtk.VBox(False, 0)
    vbox.pack_start(label, True, True, 0)

    win.add(vbox)

    # This call show the window and also add the window to the stack
    win.show_all()

def main():
    program = hildon.Program.get_instance()

    # Create the main window
    win = hildon.StackableWindow()
    win.set_title("Main window")

    button = gtk.Button("Go to subview")
    win.add(button)

    button.connect("clicked", show_new_window)

    win.connect("destroy", gtk.main_quit, None)

    # This call show the window and also add the window to the stack
    win.show_all()
    gtk.main()

if __name__ == "__main__":
    main()
The function show_new_window(widget) is set up as a handler for when the signal "clicked" is emitted. This function creates a new stackable window which is added on top of the stack by calling show().
Displaying a stackable window by calling show() or show_all() automatically adds it on top of the default stack.
Note that no extra code exists for navigation between views because the navigation button in the top-right corner of the window allows users to return from subviews. When the user presses the navigation button, the topmost window is destroyed and the previous window becomes the topmost one.
In some applications it could be necessary to push and/or pop windows on the stack without destroying them, or even to build and handle extra windows' stacks. Next section explains how to do that.
[edit] Advanced stack handling
The object which represents a stack of windows in the Hildon framework is the HildonWindowStack. This object provides functions to push and/or pop windows on the stack, functions to access the topmost window or retrieve the current size of the stack are provided as well. Usual operations
To access the default stack, use the function hildon.WindowStack.get_default(). To access the stack that contains a particular window, use HildonStackableWindow.get_stack().
hildon.WindowStack.get_default()
The following functions are available to push and/or pop windows on a stack:
class HildonWindowStack(...):
    def push(stackablewindow, ...)
    def push_list(windows_list)
    def push_1(stackablewindow)
    def pop(number_of_windows):
        return list_of_popped_windows
    def pop_1():
        return stackablewindow
    def pop_and_push(nwindows, stackablewindow, ...):
        return list_of_popped_windows
    def pop_and_push_list(nwindows, windows_list):
        return list_of_popped_windows
The example shows how to get the default stack and push a newly created window on the stack. (Note that you also can do the same in a single stack by calling show()).
Example 2.2. Pushing a new window into a stack
import hildon

win = hildon.StackableWindow()
stack = hildon.WindowStack.get_default()
stack.push_1(win)
The push functions also displays the window. show() is not needed after a push operation.
A function also exists to push a list of windows in a single step. Windows are stacked in the listed order and users only see the window that was last pushed.
Example 2.3. Pushing a list of windows into a stack
import hildon

window = hildon.StackableWindow()
window.show_all()
stack = window.get_stack()

win_list = []
for i in range(10):
    parent = hildon.StackableWindow()
    parent.set_title('Window %d' % i)
    win_list.append(parent)

stack.push_list(win_list)
Similar functions exist for the pop operation. The example uses hildon.WindowStack.pop_list() to pop N windows from the default stack and stores them in the list of arguments. Notice that hildon.StackableWindow.size() is used to check the size of the stack.
Example 2.4. Popping a number of windows from a stack into a list
import hildon

stack = hildon.StackableWindow.get_default()
nwindows = 10
win_list = None

if stack.size() > nwindows:
    win_list = stack.pop(nwindows)
HildonWindowStack object also provides more advanced functions to perform both pop and push operations at once such as, for example, hildon.WindowStack.pop_and_push() or hildon.WindowStack.pop_and_push_list(). These functions do everything in a single transition, so the user only sees the last pushed window.
When you perform push/pop operations, consider two things:
- All stacked windows are visible and all visible windows are stacked.
- Each window can only be in one stack at a time.
Due to the first one, a push operation always shows the window and a pop operation always hides the window. Functions show() and hide() always push and remove the window from its current stack, respectively.
Regarding the second one, operation push has no effect on windows which are already on a stack.
[edit] Multiple Stacks
Most applications do not need more than the default stack. Although you can use multiple stacks in one application, note that this increases the complexity of the UI, which is not desirable.
To create a new stack just use stack = hildon.WindowStack(). A new stacks behaves like a new application or task. Newly created stacks are displayed on top of the current stack. Users need to use the task selector to change between stacks when they change tasks (applications).
Once a new stack is created, use the functions explained in the previous section to pop and/or push windows on the stack.
[edit] Dialogs
Dialog boxes are a convenient way to prompt the user for a small amount of input, for example to display a message, ask a question, or anything else that does not require extensive effort on the user's part.
Hildon provides specialized widgets to cover the most common dialog's use cases: HildonNote and HildonBanner.
HildonNote is useful to ask users a question and HildonBanner is used to show textual information which automatically disappear after a certain period of time without user interaction. For more information on these widgets, see Notification widgets.
Besides those widgets, Hildon provides also specialized GtkDialogs designed to cover different use cases: HildonPickerDialog and HildonWizardDialog.
The widget HildonPickerDialog is used along with HildonPickerButton and HildonTouchSelector to give a way to make data selections. Data Selection explains the use of such widgets.
To create a guided process which helps users accomplish complex tasks step by step, Hildon provides the HildonWizardDialog widget.
[edit] HildonWizardDialog
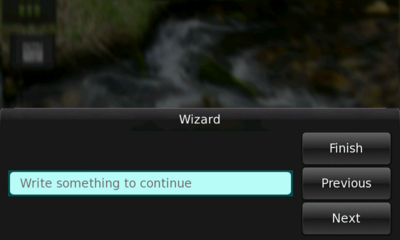
HildonWizardDialog is a widget that allows one to create a guided process. The dialog has three standard buttons, previous, next and finish, and contains several pages. Users can close the dialog by tapping the dimmed area outside the dialog's window.
A good example of a guided process which can be implemented with this widget is the setup of a new e-mail account in an e-mail client. Users have to fill several entries through several steps to accomplish the setup of the new account. The process of installing an application is another example of the uses of this widget.
This widget uses a GtkNotebook that contains the actual wizard pages. The notebook widget is pointed by the property "wizard-notebook" of the wizard. You need to create the notebook as well as the pages that are displayed. For more information on GtkNotebook, see the GTK+ Reference Manual.
To create a new wizard dialog, call:
hildon.WizardDialog(parent_window, wizard_name, gtk.Notebook)
The parent window is usually the current visible view. The wizard name is displayed as title in the wizard dialog.
Usually, you want to validate user input to decide whether it should move to the next step or not. To do that, set a user function by using:
hildon.WizardDialog.set_forward_page_func(page_func, data, destroy_notify)
The function above sets the function "page_func" to be used to decide whether the user can go to the next page when pressing the forward button. The function must have the following signature:
def some_page_func(notebook, current_page_number, user_data)
Here, an example of using a HildonWizardDialog
Example 2.5. Example of a Hildon wizard dialog
# Based on C code from:
# "Hildon Tutorial" version 2009-04-28
# Example 2.5, "Example of a Hildon wizard dialog"

import sys

import gtk
import hildon

def on_page_switch(notebook, page, num, dialog):
    print >>sys.stderr, "Page %d" % num
    return True

def some_page_func(nb, current, userdata):
    # Validate data only for the third page.
    if current == 2:
        entry = nb.get_nth_page(current)
        return len(entry.get_text()) != 0
    else:
        return True

def main():
    # Create a notebook
    notebook = gtk.Notebook()

    # Create widgets to palce into the notebook's pages
    label_1 = gtk.Label("Page 1")
    label_2 = gtk.Label("Page 2")

    entry_3 = hildon.Entry(gtk.HILDON_SIZE_AUTO)
    entry_3.set_placeholder("Write something to continue")

    label_4 = gtk.Label("Page 4")

    # Append pages
    notebook.append_page(label_1, None)
    notebook.append_page(label_2, None)
    notebook.append_page(entry_3, None)
    notebook.append_page(label_4, None)

    # Create wizard dialog
    dialog = hildon.WizardDialog(None, "Wizard", notebook)

    # Set a handler for "switch-page" signal
    notebook.connect("switch-page", on_page_switch, dialog)

    # Set a function to decide if user can go to next page
    dialog.set_forward_page_func(some_page_func)

    dialog.show_all()
    dialog.run()

if __name__ == "__main__":
    main()
Apart from how to create and use a wizard dialog, this example also sets up a handler to catch the signal "switch-page" from the notepad. This signal is emitted by the widget GtkNotebook when the user or a function changes the current page.
[edit] Using GtkDialogs in Hildon applications
In general, you can use GtkDialog much like you use it in a GTK+ application, but consider the following:
- In Hildon applications, buttons "cancel", "reject" and "close" are allowed. However, buttons which emit the signal "response" with
gtk.RESPONSE_CANCEL,gtk.RESPONSE_REJECTorgtk.RESPONSE_CLOSEas the response's identifier are not displayed. Therefore, if you need to deal with the action of closing aGtkDialogin a Hildon application, be aware of this detail and handle thegtk.RESPONSE_DELETE_EVENTresponse identifier properly. - Another detail to take care of is that
GtkDialogs can work in two modalities in a Hildon application: task-model or system-model. A dialog is task-modal if it is transient for the main window. That is the case when the functiongtk.Window.set_transient_for()is used or the dialog was created by callinggtk.Dialog()specifying a parent window. Otherwise, the dialog is system-modal.
If the dialog is task-modal, the Platform UI (Task button and Status area) are visible on top and can be used normally to switch between tasks.
If the dialog is system-modal, both the task button and status area are blurred and dimmed. They are not active while the dialog is open and task switching is not possible until it closes.
The following is an example for creating a task-modal dialog.
Example 2.6. Application modal dialog example
# Based on C code from:
# "Hildon Tutorial" version 2009-04-28
# Example 2.6, "Application modal dialog example"

import gtk
import hildon

def main():
    win = hildon.StackableWindow()

    win.show()

    dialog = gtk.Dialog()

    dialog.set_transient_for(win)

    dialog.set_title("Hello!")

    dialog.show_all()

    dialog.run()

if __name__ == "__main__":
    main()
- This page was last modified on 7 October 2010, at 10:50.
- This page has been accessed 18,551 times.


